I had originally planned to use this post to log my adventures in desoldering the CPU from the Nintendo Entertainment System (NES), but, alas, the campus couriers are holding the all-important solder sucker hostage. Instead, I’ll talk a little bit about the work we’ve done with the Super Nintendo Entertainment System (SNES), which involves significantly less molten metal.
One goal of the Preserving Virtual Worlds 2 (PVW2) project is to provide videogame curators with information and tools to make their job easier. One small but important step in any digital preservation workflow is auditing the files–making sure that the bitstream you have in your repository is the same as the bitstream on the original media (or, down the line, making sure that the bitstream in the repository is the same as the bitstream you originally ingested). This is sometimes referred to as an integrity check, and with files stored and accessed on ordinary media is a relatively trivial matter of calculating a checksum at ingest and checking that the same number is still derived when the same algorithm is applied to the bitstream at regular intervals. When data is being migrated into a new format, it is also wise to make sure nothing is lost when accessing the file in the new format, which is why you’ll find color strips in the toolkit of digitization QCers.
When we migrate SNES games to a media neutral format, we’re taking code that was originally burned into a read-only chip (ROM) and creating a digital file. We then access that digital file using a software emulator instead of proprietary hardware designed to do nothing but read those cartridges. This raises two questions:
- How do we know that the file we save matches the file originally burned on the ROM?
- How do we know that the emulator is correctly interpreting the ROM?
To answer these questions, we’re using a nifty device called the Retrode2. The Retrode allows you to play SNES cartridges with original SNES controllers through an emulator on your computer. As a side effect, it also allows you to extract ROM files and savegames (SRAM) and to write new files to the SRAM. The following workflow is based on the assumption that
- A ROM file which will read an original savegame from an SNES cartridge is likely an accurate representation of the game.
- An emulator which produces a savegame which can be loaded by the game on the original cartridge likely presents an accurate representation of gameplay.
Setting up the Retrode2

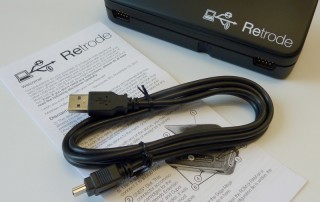
The Retrode box contains the Retrode unit, a Mini-USB cable, and a simple sheet of instructions. SNES cartridges are inserted in the rear slot, facing backwards. Controllers are plugged into the side ports.
Before using the Retrode, it is necessary to flash the firmware (the firmware it ships with is known to have some errors with SNES controllers). The latest firmware, along with some basic instruction, are available here. If you’re using Windows and have difficulty with FLIP, try running it as Administrator.
Once you’ve successfully updated the firmware and reset the device, open up the Retrode in a file manager. Note the datestamp–files on the Retrode will always display this datestamp, even if you have updated them (when the device has been reset after any file changes).

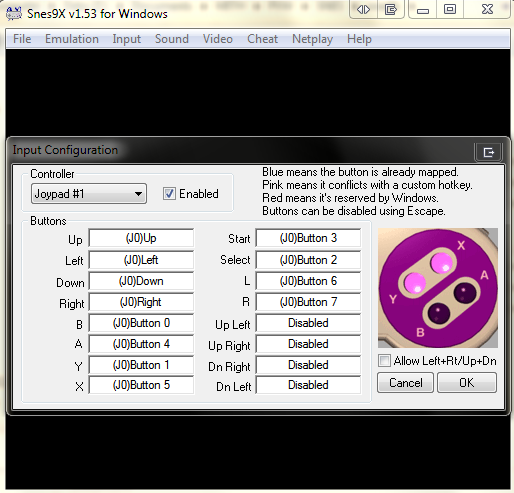
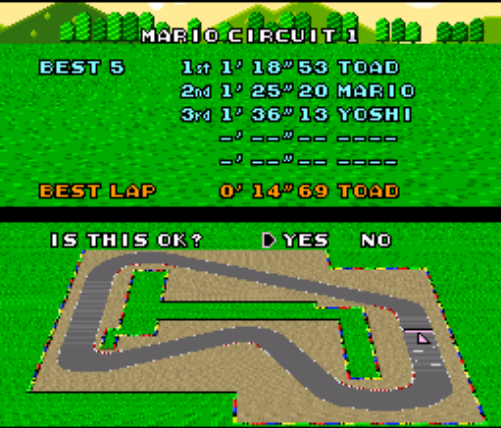
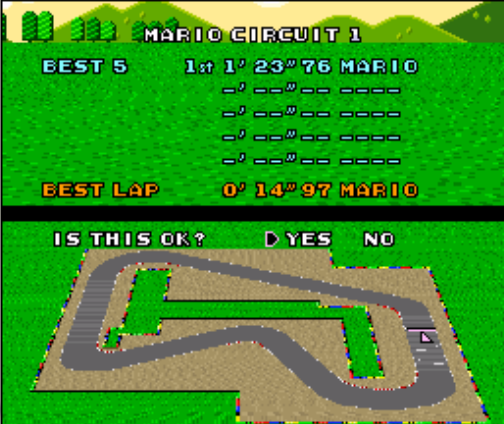
Open the file RETRODE.CFG in a text editor. Your filenames may include a number after the game title. If you’d like to disable this, change the value on line 15 for Here it is, set up and running Super Mario Kart: SNES9x is an emulator available for all major platforms. To run it, simply extract the contents of the zipfile to a directory of your choice. The SNES game pad must be setup as the input device within the emulator. To do this, select Input->Input Configuration in the top menu or press Alt+F7. Click your mouse in the “Up” textbox, and then press the corresponding buttons on the SNES controller until all buttons have (J0) or (J1) values. Ignore the buttons after the R-button. Select File->Load Game or type Ctrl+O and navigate to the Retrode directory. Open the *.sfc file; opening the *.srm (save) file will just cause the emulator to hang. When you play the game, it should reflect any data currently stored in the cartridge’s SRAM. The *.sfc file can be copied to SNES9x’s Roms directory for later play without the Retrode. To extract a save file, simply copy the *.srm file to a local directory (for instance, SNES9x’s Saves directory). Ensure that [sramReadonly] on line 17 is set to 0 in RETRODE.CFG. If you get “Access denied.” or a similar error message when attempting to inject a save, this value is set to 1. Some command-line work is necessary to inject a new savefile onto the SRAM. In Windows, type “cmd” in the Start Menu, right click the program that shows up, and select “Run as Administrator.” On other platforms, use the Terminal. Note the location of the NEW save file as well as the drive letter/location of the Retrode. The new save file must have the same name as the file you are replacing. Case is important. In this example we will be placing a new save file onto a Super Mario Kart cartridge. At the command line (in Windows), type: type C:PathtoNewSaveGame.srm > D:SaveGame.srm so, for Super Mario Kart type Z:DocumentsMITHPVWSNESsnes9xSavesSuperMarioKart.srm > D:SuperMarioKart.srm on Mac/Linux you can either use cat /path/to/New/SaveGame.srm > /path/to/SaveGame.srm or dd if=/path/to/New/SaveGame.srm of=/path/to/SaveGame.srm When you look at the Retrode in a file manager, the srm file should now reflect today’s date. After the Retrode has been reset, even if you were successful, the datestamp will revert to the standard 1990 date. To see if the transfer was successful, clear out any files in SNES9x’s Save directory (it has a tendency to privilege local save files) and open the *.sfc file from the Retrode. The game data should now reflect the new savegame rather than whatever was originally on the cartridge. The easiest way to check this in Super Mario Kart is to look at Time Trials. If for some reason you get a CHKSUM error and SNES9x hangs, fear not! Playing the game with an original SNES console should fix the problem. This is most likely to happen if you use the OS’s GUI copy command rather than writing over the file at the command line. The save data originally on the cartridge. The new save data. The drawback to this workflow is that it only works with SNES cartridges that support saving. It also depends on the battery which powers those saves being live, though it is easy to replace that battery with a little technical know-how. It does, however, give us a way to audit a fair subset of SNES games and it’s a lot of fun!

Setting up an Emulator

Extracting and Injecting Battery Saves


Interesting post! A few thoughts:
I’m not sure I understand exactly what’s happening (so apologies if I’m barking up the wrong tree) but that doesn’t sound like a completely convincing integrity check.
Isn’t there a Snes ROM checksum you could utilise here? http://romhack.wikia.com/wiki/SNES_header.
Another approach would be to download the same ROM image from various websites, checksum them, and compare with your checksum to see if they all match up. Comparing with just a few sources would give you a reasonably high level of confidence.
Publishing the checksums for each ROM image would allow others to compare and/or correct. Had a quick look round the web but couldn’t find anyone doing this. Wouldn’t surprise me if someone is somewhere though…
It’s not without its problems, but neither are the existing checksum lists (there are tools that will check a ROM against a list, as well)–unlike the NSRL, none of them are backed by a government entity! Someone does have to create the First ROM, however, and there’s not a good way to do that prior to ripping it. Given that the Retrode essentially imposes an artificial filesystem, a particularly careful person might argue that we can’t say it ALSO alters the file itself.
I DO think having a registry of checksums maintained by some Trusted Entity would be lovely.
I’m sorry, but I don’t know if you have really done enough research into SNES preservation. How can you write an article about SNES preservation, and not even mention the BSNES emulator, which is a far more accurate emulator than the SNES9x? Byuu, the author of BSNES, has created hardware that is far superior to the Retrode in respect to backing up SNES games, and can work on games with special coprocessors such as the SA-1. He, along with other projects such as No Intro, have been working on preservation projects for the SNES for years. There is no point in the duplication of efforts.
Evan is right. I’ve been following byuu’s work for years. He’s literally the #1 person to talk to about SNES preservation from hardware to software and even in image preservation of boxes, instructions, etc.
With all do respect, a SNES preservation article STARTS with detailing byuu’s work. Anything short of that completely misses the mark.
My apologies of the typo for “do” which should be “due”.
Evan:
Someone mentioned BSNES on Twitter, as well–believe me, I tried! But for whatever reason, it threw errors on my machine when I tried to use it with the Retrode, which is the hardware we chose to use for this project due to availability, ease of use (a big factor), and cost. Bear in mind that PVW doesn’t focus exclusively on the SNES, but also includes games for the NES, Dreamcast, GameCube, Wii, and various generations of PC/Mac–which unfortunately means that not every platform will get a thorough investigation. Were I to have a year and a budget dedicated to the SNES, I’d certainly go through many more options.
I also won’t deny a certain amount of nostalgia for both ZSNES and Snes9x, aged though they might be. =)
Well, I’m not a programmer, and I barely know about the structure of the Super Famicom/Nintendo, but copying a rom isn’t an actual preservation of the game, not even the slightest. You have forgotten scanning the manual, the box and the labels, PCB photos, memory maps, the bios and firmware of the chips used for certain games, and of course using an accurate emulator like bsnes or its port for RetroArch.
Availability and cost aren’t reasons to use an inferior product like the Retrode when there are far better dumpers, or using a casual emulator like Snes9x with uses game hacks. If this were a random blog entry from an obscure site I wouldn’t care at all (most people just want t play the most popular games and they don’t care if an emulator does not correctly emulate a random and unused function of the SNES’ CPU), but this is the website of the Maryland Institute, so I expect a big research into SNES preservation, or at least some words about romsets like No-Intro or Zapatabase.
Seriously, just make an account on board.byuu.org. You would learn a lot if you’re interested.
Hi Rachel,
There are preservation scenes for those systems as well. No Intro handles most cart based systems, while redump.org checks disc based systems (their site has been down for the past week or so for some reason). These two sites are major collaborative sites, where multiple people check the hashes of the ROM and disc images to ensure they are properly copied. There is also the MESS project, which takes things a bit too far, in my opinion. I really don’t think it would be possible to do a major preservation project without major collaboration, just because of the sheer cost of acquiring the games. I’d really suggest looking into these projects, so that you don’t have to start from scratch. Personally, I don’t think there is really much of a need to redump every single game again, as this has already been done for the most part.
Checking things to make sure they are dumped correctly is important, but I think that energies should be spent on more important projects. For instance, in my spare time I have been documenting prototypes of SNES games (here is a good example). The issue with prototypes is that many of them are indeed undumped and undocumented. Cart based prototypes also have the disadvantage of being on EPROMs, which tend to lose their data due to corruption much faster than commercial games, which are on MASKROMs. Many of these prototypes are in the hands of private collectors, who tend to want top dollar, so again collaboration is key to make sure that the price is not driven up. We all have the same goals here.
All this said, I have to admit that binary preservation is only a side goal of my hobby. My primary objective on my website SNES Central is documentation. I’ve done a lot of work trying to track down unreleased games, and of course prototypes. My archive (not what is on my site) has over 200 prototypes. I’ve also started documenting packaging variants, such as releases in different countries and re-releases. I’ll fully admit that gameplay is entirely secondary to what my site is about, as I think that is covered in other places. I’d also suggest checking Game Rave, a website similar to my own, but with a focus on Playstation and Saturn games.
I hope I didn’t come off as being rude earlier. I think that collaboration is important, and that there has indeed been a deficiency in serious academic documentation of video games. I’ve spoke with developers over the years, and it is amazing how little was actually backed up and saved during the 90s. A lot of companies would throw out their source code and transitional versions of the games (perhaps the exception is Sega, where there is a huge archive of alpha and beta versions of Genesis games available). Having a credible academic organization going after these materials would benefit everyone.
I would enjoy chatting with you about these things. Do you go on IRC? There are many like minded people out there…
Cheers,
Evan