Auto Line Recognizer
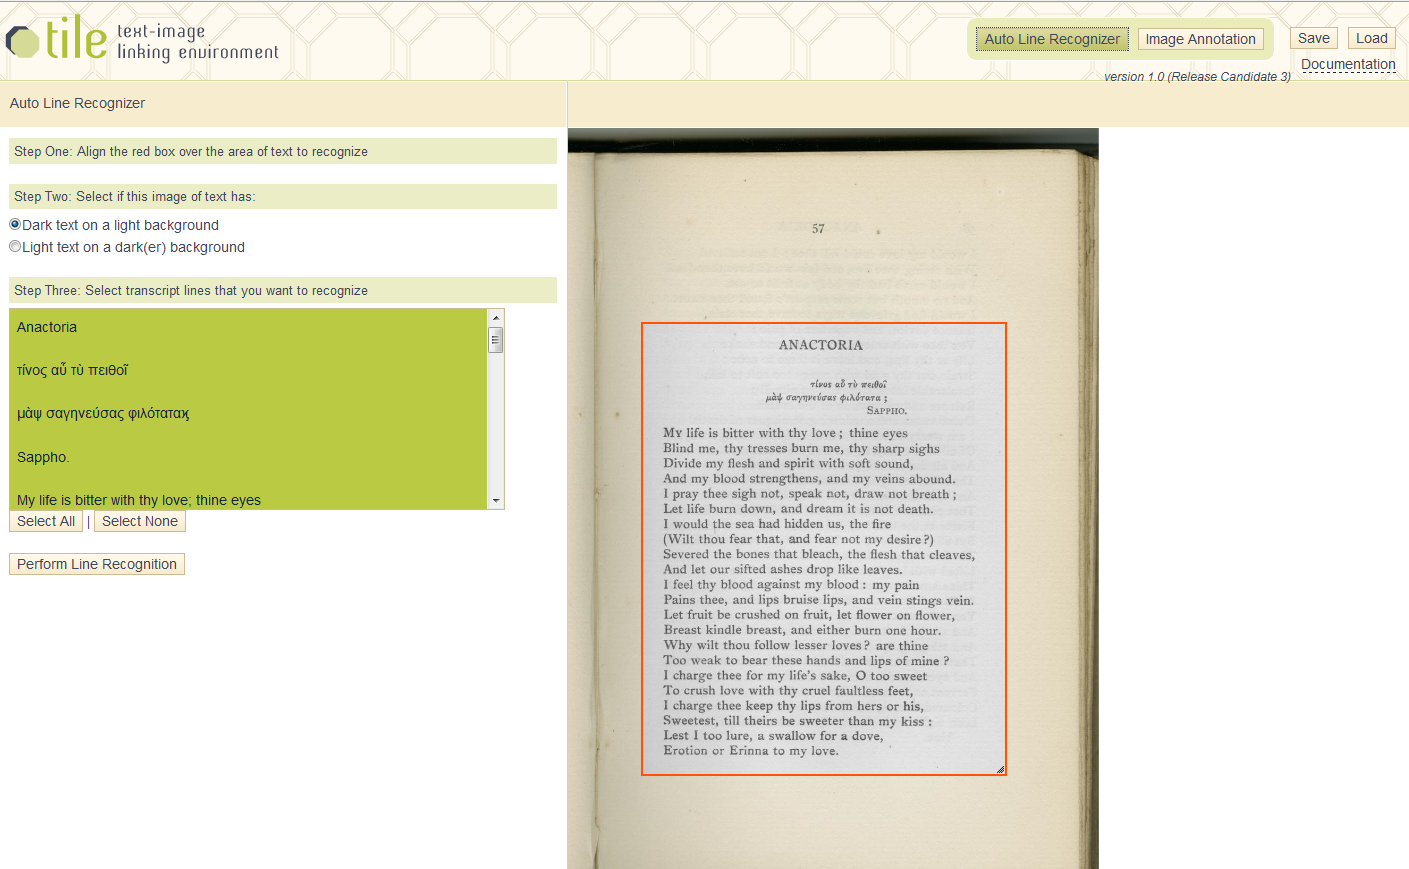
Manually linking text to regions of the image can be tedious. To help with this, TILE includes a tool called the Auto Line Recognizer which can create an initial set of links between lines of transcript text and the text lines of the image. It is not 100% accurate, but it provides a way to semi-automate the creation of shapes for each transcript line.
The Auto Line Recognizer only recognizes lines of text. For information on plugins that recognize other shapes, or for information on how to create your own auto recognizer plugin, see the Plugin documentation.
Here’s how to use the Auto Line Recognizer:
- Navigate to the desired page.
- Click on the “Auto Line Recognizer” button.
- The interface will change slightly. The Transcript Area and the Label Area will be replaced with the Auto Line Recognizer.
- You can click on the “Image Annotation” global button to return to the Image Annotation mode.
- Move and re-size the red selection box as necessary to choose the section of the image which contains the desired lines. The selected region will become gray-scaled.
- Choose whether the image has dark text on a light background or light text on a dark background. .
- It is recommended when working with an image of a two page spread or multiple columns to select one page or column at a time in order to avoid the detection of lines across the two pages or columns.
- Next, in the transcript line selector, select the lines of text that occur in the selected region of the image.
- Make sure only those transcript lines that occur in the selected region of the image are chosen.
- Click “Perform Line Recognition” button to run the Auto Line Recognizer. Otherwise, click the “Cancel” button to cancel and return to the Image Annotation mode.
- Once the Auto Line Recognizer has analyzed the image, it will display the results and let you decide if they are close enough.
- If you don’t like the results and want to try again, click the “Start Over” button to try again.
- If you are happy with the results, click the “Accept” button to return to the standard image annotation mode. You can then modify the shapes if necessary.
- Check the accuracy of the created shapes and make any necessary changes and then repeat for each additional page or column.


